Once upon a time I searched on Pinterest for every cabbage recipe I could find. I love cooked cabbage! With all that hunting and pinning, two simple “recipes” that I created myself are still my favorites: sautéed cabbage “steaks” and this delicious Potato & Cabbage Soup.
I thought I was finished with my hearty soups for this season, but after I was ready to relax and enjoy those lazy, hazy, crazy days of summer, we got a cold snap. I keep reminding myself that I can count on those in May! So I made up some Potato & Cabbage Soup earlier this week to warm myself.
It does have that tantalizing little hint of spring in the dill.
Ingredients
Garlic, 8 cloves minced
Onion, 1 large Spanish, 1-2″ chunks
Extra virgin olive oil, 1/4 or cover the bottom of soup pot
Tomatoes, petite diced, 2 lb. (or a 28 oz. can of petite diced tomatoes)
Tomato paste, 6 oz. can
Chickpeas, 1/2 cup dried
Canellini beans, 1/2 cup dried
Red kidney beans, 1/2 cup dried
Carrots, 4-5 large sliced
Celery, 4 large stalks sliced
White cabbage, 1 whole small, 1-2″ chunks
Potatoes, 3 large, 1-2″ chunks
Salt, 2 TB (start with 1 TB and bring up to taste)
Cumin, 2 TB
Szeged hot paprika, 1 tsp., slightly rounded
Dill, fresh, 1 large bunch, minced
Water to cover
Procedure
Rinse beans and add to a 2-4 quart pot, add plenty of water, bring to a boil, lower heat and simmer until barely al dente. Remove from heat, and set aside.
Sauté garlic in extra virgin olive oil in a large soup pot.
Add onion, carrots, celery and cabbage, and sauté for a short while.
Add tomato paste and diced tomatoes to the mix and stir in.
Add the barely cooked beans with their cooking liquid.
Add water to cover. I added three quarts, but use the water to make it the consistency you like. Bring to a simmer and cook until flavors meld and potatoes can be pierced with a fork.
Add seasonings and additional water if needed. I usually use about 1 TB of salt per gallon of soup, and this recipe makes about two gallons.
Sprinkle minced dill in at the end of the cooking time reserving a little bit to sprinkle on servings.
Serve and enjoy!
For more, visit my blog, vegetatingwithleslie.org, “Like” me on FaceBook/Vegetating with Leslie or follow me on Twitter, @vegwithleslie.
One of the features of Middle Eastern food that I really appreciate is its tendency to mix things that I grew up thinking shouldn’t be mixed. Today the wisdom in the U.S. is still that two grains and three beans would be too much to load together in one meal. That it’s frequently done with great effects in Middle Eastern foods feels almost like a celebration to me.
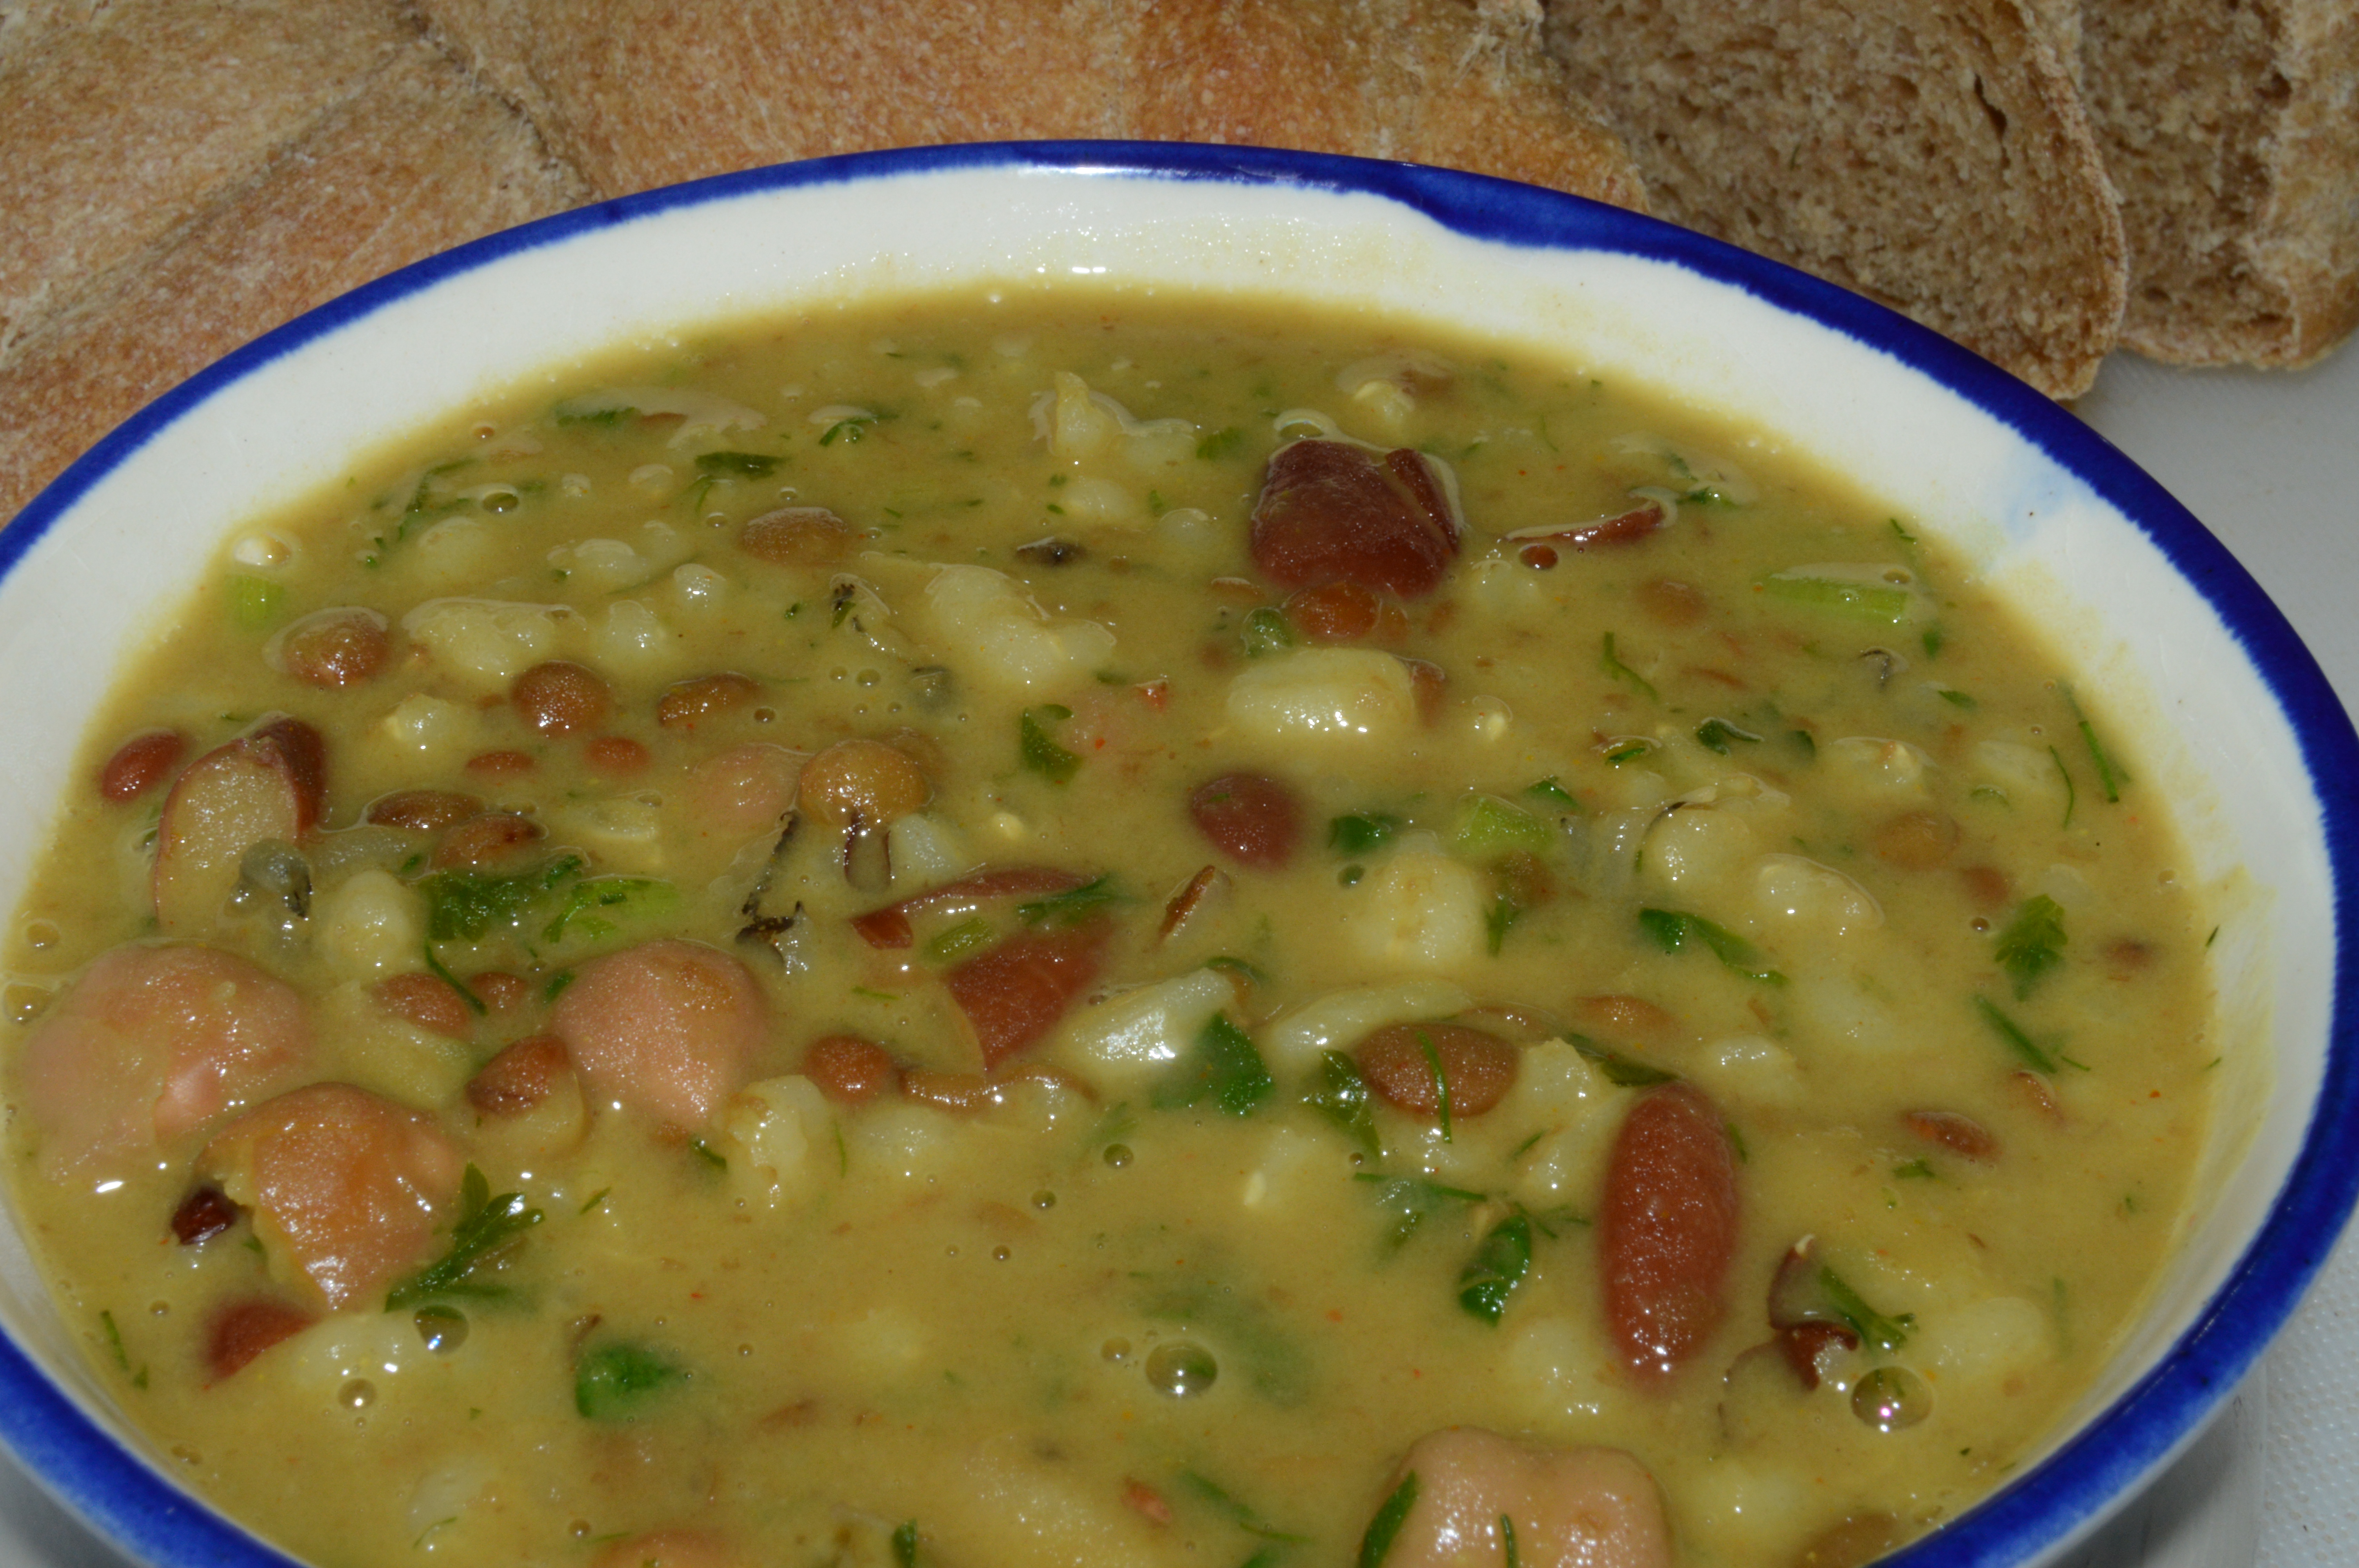
Koshari is an example of this joyful piling together of starchy foods. Koshari is an Egyptian dish, a layering of rice, pasta, black lentils and chickpeas along with other ingredients. This delicious, creamy Persian soup, Aash e-Jo (barley, rice and 3 kinds of beans), is another example.
I started with a recipe from Persian Recipes. I made a few changes in the process so it would be easier to make, some changes in seasoning to suit my taste buds and a change in ingredients to make it vegan.
The result is a delicious, creamy, mildly seasoned soup with a nice hint of dill. I enjoyed the soup with a piece of my homemade spelt challah, of course.
Beans (garbanzo, white beans, kidney beans and lentils), 750 grams
Brown rice, 1 cup
Spanish onion, 1 large petite diced
Extra virgin olive oil, 1/4 cup
Coconut milk (full fat), 1-2 fourteen oz. cans
Salt, 2 TB
Hot paprika, 1 tsp.
Turmeric, 1 TB
Water, 3 quarts plus
Procedure
Petite dice the Spanish onion and put into a soup pot with 1/4 cup extra virgin olive oil. Saute until caramelized.
Rinse beans (about 4 cups) and add to soup pot. Add three quarts water and bring to a boil. Reduce heat to a low simmer, cover and let cook until done.
While the beans are cooking, prepare the barley in a second pot. Just place the barley in the pot and add at least three times the volume of water. Bring to a boil, reduce the heat, cover and let cook until done. Check the water periodically to be certain it covers the barley. When done, drain and set aside until the beans are cooked.
Prepare the rice. Please one cup of rinsed rice in a pot with 6 cups of water. Bring to a boil, reduce the heat, cover and let cook until done. Drain, and set aside until the beans are cooked.
Combine rice and barley in the soup pot with the beans and onion. Add seasonings and let continue to cook covered on low heat until the seasonings blend.
When the soup is finished, add chopped spinach, cilantro and parsley. I always end up adding more than this because . . . well, I have more and I like veggies.
Just before you’re ready to eat, stir in the minced dill (I used about a cup), reserving a little bit to sprinkle on top as you’re serving.
Enjoy!
For more, visit my blog, vegetatingwithleslie.org, “Like” me on FaceBook/Vegetating with Leslie or follow me on Twitter, @vegwithleslie.
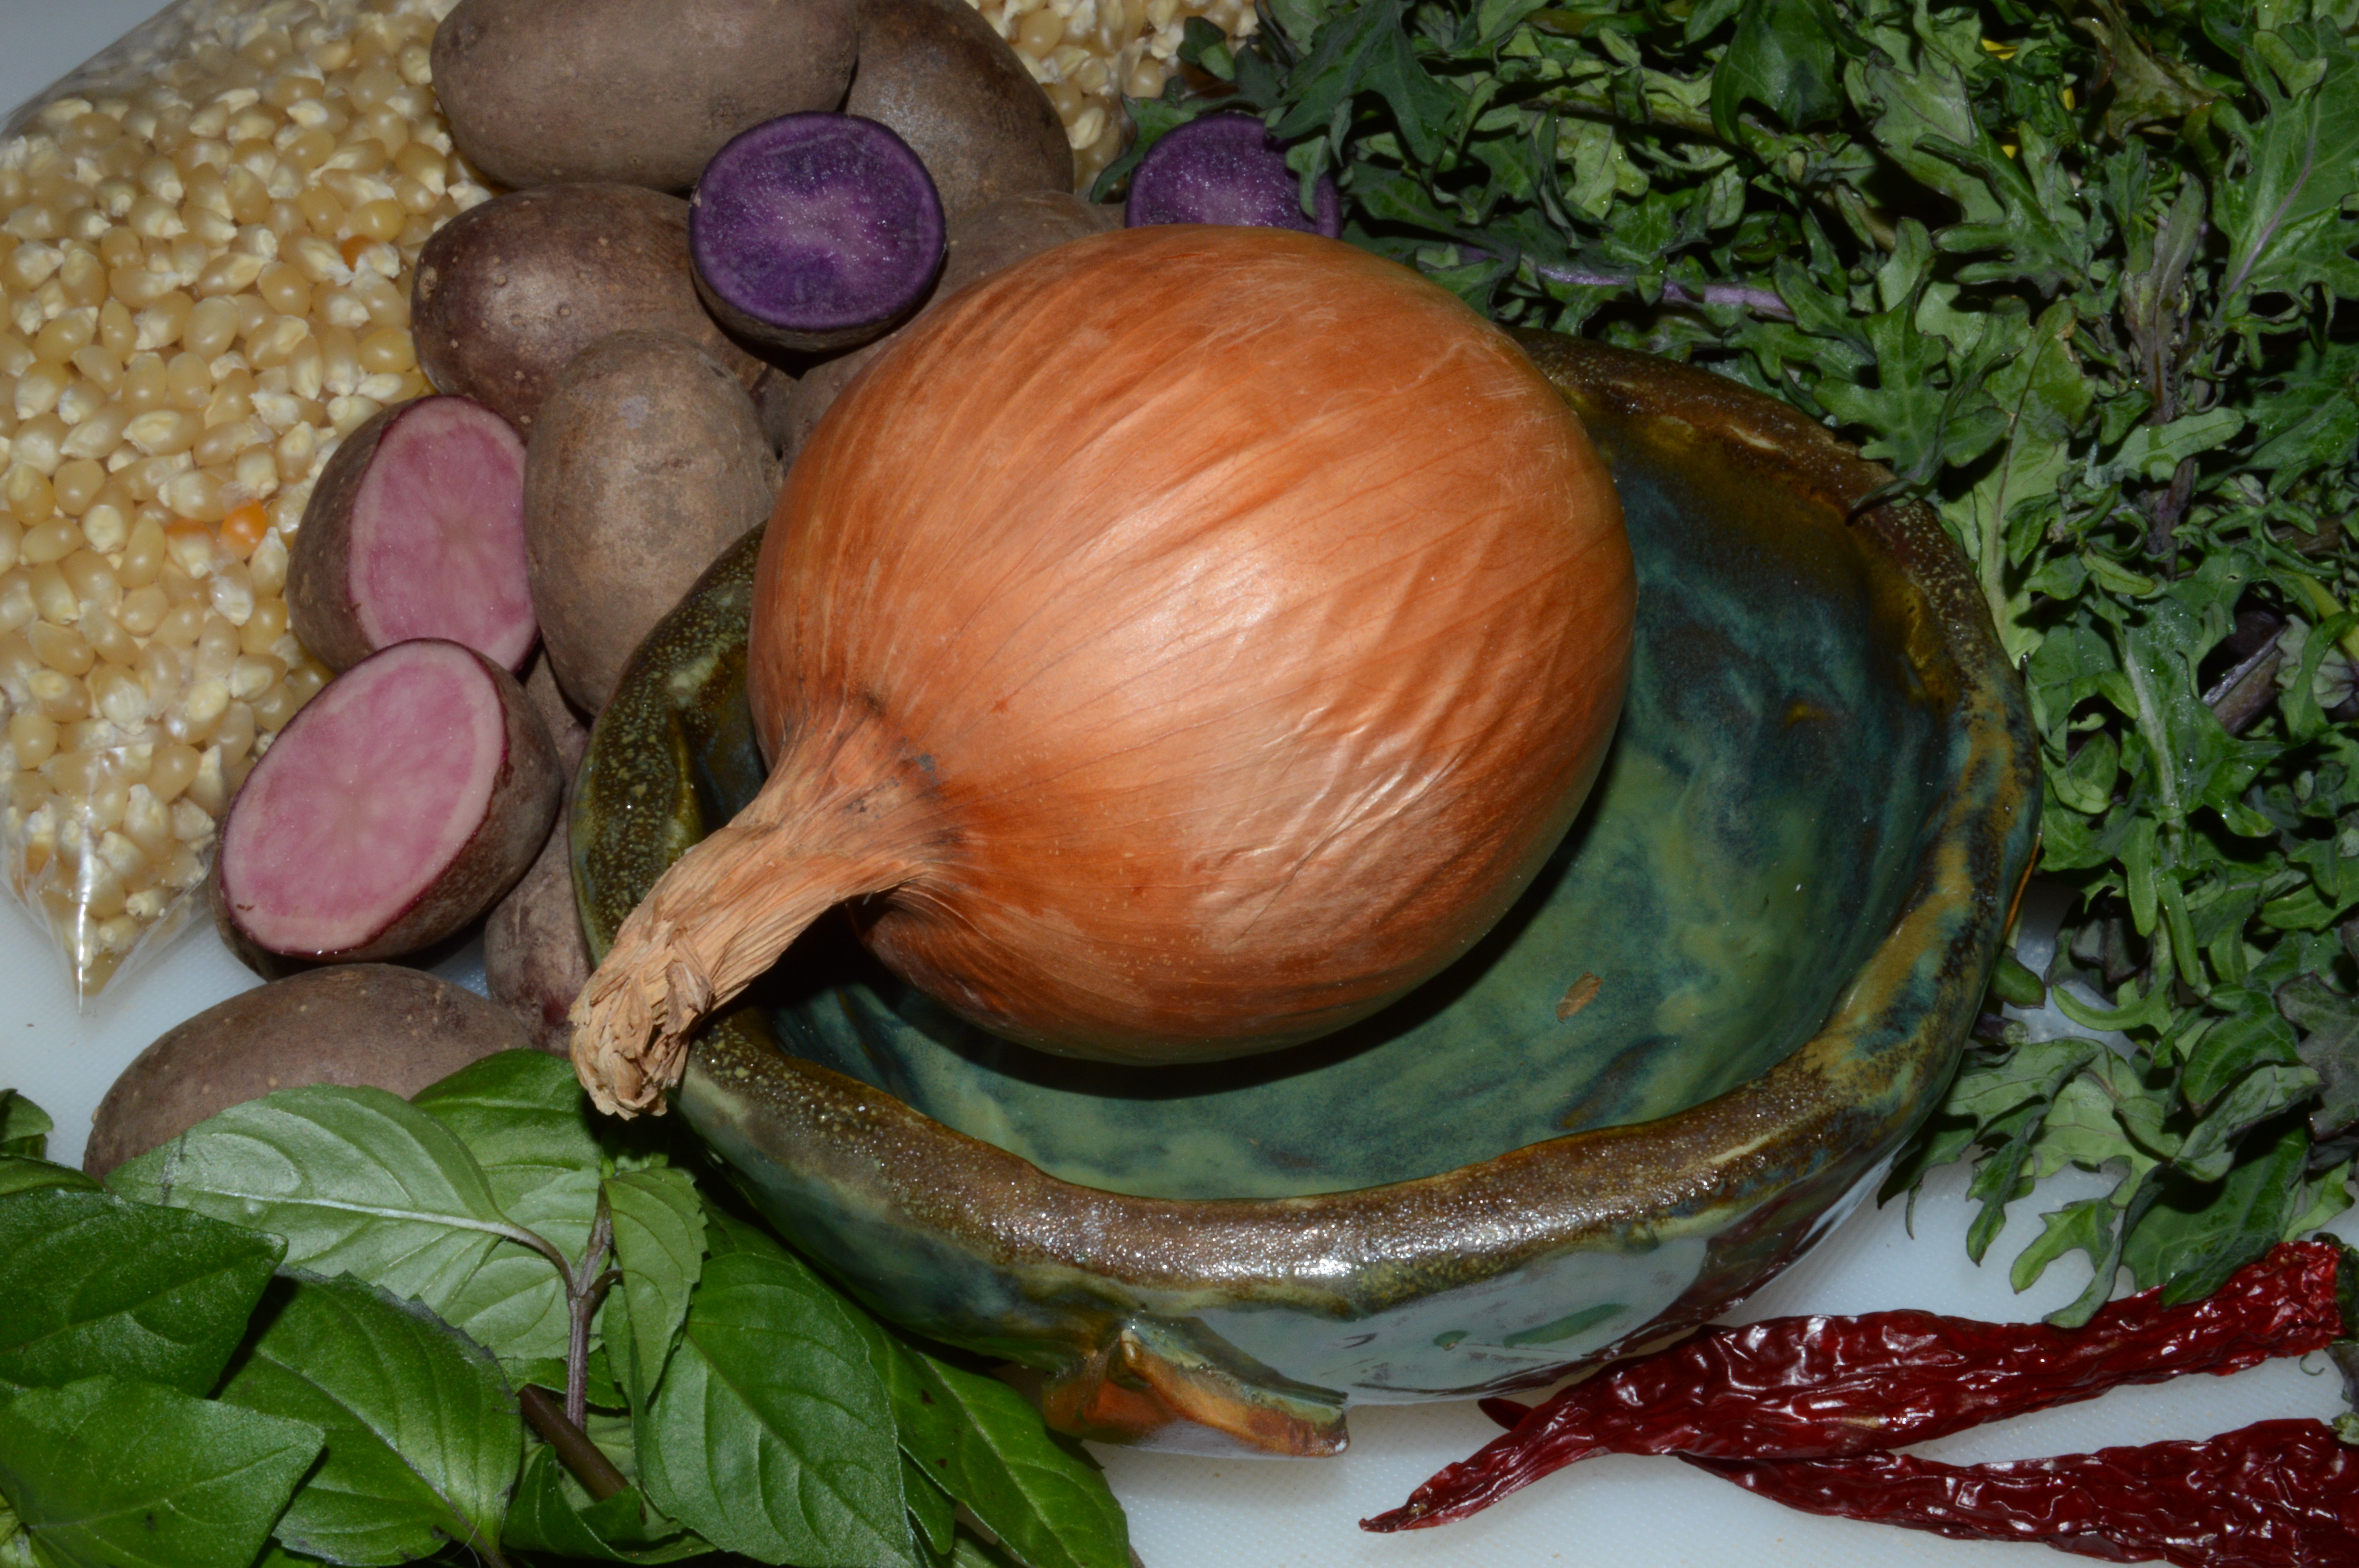
Here’s my bounty from the Woodstock Farmers Market on opening day, this past Saturday: fresh basil from BlueLoom (Keith & Nancy Johnson), a Spanish onion, red and purple potatoes and early kale from Edmonds Acres, my favorite popcorn from Brook Farm and a beautiful ceramic bowl from Woodstock High School art student, Tyler Owcarz.
VEGGIES! Beautiful spring veggies!
It was a spectacular day on Saturday, a perfect day for the opening of the Woodstock Farmers Market. I love the Market and look forward to it moving back onto the Square each spring.
Keith Johnson, Market Director, has built this award-winning Farmers Market into a happening twice a week May through October on the historic Woodstock Square. Off Square Music performers fill the surrounding area with music. There is no better way to celebrate spring and summer days than to greet friends and shop for local products accompanied by Woodstock’s talented musicians.
And it doesn’t end in October. Now we have a winter Market as well that meets two weeks a month in Building “D” at the McHenry County Fairgrounds.
What I made from my Woodstock Farmers Market goodies
One of my favorite stops is always Edmonds Acres. Troy Edmonds specializes in specialty garlic and onions, unique apples, fruit and vegetables, wild mushrooms and fall squash.
Troy Edmonds of Edmonds Acres in Marengo.
I can always find something that I want to run home and cook up at Troy’s table, and Saturday was no exception. I combined that organic onion with some organic celery and carrots I had to make up my delicious Red Lentil Soup. This time instead of cilantro I added Troy’s early kale to the soup.
Red Lentil Soup topped with fresh kale and served in a ceramic bowl created by Tyler Owcarz of Woodstock High School.
I confess I had to have some right away in the beautiful bowl made by Tyler Owcarz of Woodstock that I purchased at the Woodstock High School table. Art students created about 100 small bowls that they are selling for $10 each to benefit the Woodstock Food Pantry.
Will the circle be unbroken…
And talk about the circle being unbroken! Not only did that bowl go from the High School to the Market to me and the Food Pantry . . . but Troy’s beautiful veggies went from his table to my pot to serve up to the musicians and audience at First Saturday, an open mic sponsored by Off Square Music that meets once a month at Unity Spiritual Center on Calhoun St. in Woodstock.
And now for the fresh basil from Keith and Nancy Johnson (BlueLoom) that I snipped onto the potatoes that I just couldn’t wait to cook up and eat: nothing says spring like fresh basil! I enjoyed it twice on Saturday, once with my potato lunch when I got home and again later with a juicy tomato snack.
Fresh red and purple potatoes ready for roasting with a little extra virgin olive oil and sea salt.And now ready to eat after roasting for a few minutes in a pre-heated hot oven. I snipped a little basil onto them. Yum!
So as I mentioned, I went to the First Saturday open mic that evening, which is always a wonderful music event. I didn’t get to service my popcorn addiction that evening, tho. You can bet I did the next evening!
I ran out of Rich Brook’s (Brook Farm, Harvard, IL) popcorn over the winter and was waiting eagerly for him to return to the Market. I don’t know how he does it, but that popcorn is sooooooo much better than what I can get in the store. I’m halfway through the bag I bought already! Guess I’ll have to plan to visit the Woodstock Farmers Market again next week.
Water Challah or Berches was a tradition in my home for a long time. Spelt water challah is a little newer and sadly doesn’t come together every week now but whenever I can.
Thirty-five years ago, I made challah weekly. In recent years, my schedule hasn’t allowed me to continue this practice. When we began to host Shabbat dinners in my Cafe, some of our regulars always brought in whole wheat challot from a bakery forty minutes from us. On a recent week when that particular group was unable to attend, I decided to try my hand again at making challah.
These days I have considerations I didn’t have thirty-five years ago. One is that I like more of a whole grain loaf than I did in years past, and grains require time and patience, as Sally Fallon points out in Nourishing Traditions.
Another consideration is that I wanted the challot to be vegan, that is, they should use only plant food ingredients, no animal products. With the traditional egg challah, that changes the program considerably. Since my favorite challah, though, is water challah, which I remember fondly from my days in West Rogers Park, that didn’t strike me as a problem. Wrong.
Try searching the internet for a water challah recipe! Many of the recipes with that name included eggs, at the very least an egg wash on the crust to hold the seeds on top. More often the eggs were in the challah itself. Puzzling.
In other search results, it was clear that the search engines simply brought up a result for water challah because the recipe was for challah, which contained water. In addition, all the recipes had quite a bit of sugar.
After much searching, I decided to try using my spelt and 7-grain cereal roll recipe. That worked – sort of. The loaves weren’t as pretty as I hoped and ended up going into my freezer for future home consumption. Back to the internet.
Finally I found an article using the name berches. With that new search term, I was able to find a host of appropriate recipes, recipes with no eggs and very little sugar. I actually did try one of those recipes, and it worked beautifully with one exception – the crust dilemma.
How could I get that beautiful, shiny crust so characteristic of challah and hold an abundance of seeds to the loaf? Flaxseed and water can work as an egg substitute in many cases, so I tried a flaxseed/water wash. It turned the crust white, and all the seeds dropped off. I tried several other techniques, but nothing worked. Finally I gave up on the seeds, but I gave a little shine to the crust by brushing it lightly with extra virgin olive oil when it came out of the oven.
In the search for a water challah recipe, here are some things I learned about challah-making that will enrich my own experience:
What I was calling water challah was an egg-free type of challah made in Germany and called berches. The word berches is from the word berach or “bless”. It refers to the challah or bread that one blesses at the Sabbath meal. Many Jews, German and other, no longer know or use that word for the challah, but there are a few bakers in Germany who continue to make it. I was enjoying a commercial variety in West Rogers Park under the name water challah.
Traditionally challah has seven ingredients, corresponding to the seven days of the week or to the fact that Shabbat occurs on the seventh day: 1) flour, 2) water, 3) yeast, 4) salt, 5) sugar, 6) eggs, and 7) oil.
When the Temple was destroyed in 70 c.e., the rabbis created a system of substitutions for Temple worship and a priestly sacrificial system. The family table substituted for the altar, and the ordinary Israelite took on the role of priest. The two loaves of challah on the table represent that transition with the challah substituting for the two loaves of showbread on the ancient altar.
Women were included in that transition as well, and challah-making is a place where we can see that clearly. Part of the ritual of challah-making includes separating the challah, removing a small piece of the dough, saying a blessing and burning the piece in the oven. Since women, once upon a time, were likely to be the ones making the bread, this “sacrifice” would have been an example of their taking on the role of the priest in the absence of a Temple and priestly system.
Most importantly, what I learned from challah-making is how rituals can create a thoughtful, meditative experience and, by the way, good (and nourishing) food. At the intersection of the rituals of bread making, rituals I have developed over the years for creating healthy foods, my newly developing ritual of vegan bread making, and the rituals of challah-making, I had an opportunity to experience with full awareness my place in the cosmos, in history and in the environment. As I ate the challah I made, I experienced it as the Staff of Life it once was and can still be.
Here is my recipe for spelt berches or water challah, which I now make as often as I can again. Be sure to WEIGH the flour. Your challah will come out perfectly every time!
If you’ve never used spelt, try it. It’s a form of wheat flour, and it is absolutely beautiful to work with. I use spelt in all my breads now.
BERCHES (Makes 2 loaf pan-sized loaves or two double-braid loaves. 3 lb. 8.2 oz. of flour are required to separate and bless the challah, so if you’d like to perform this ritual, double the recipe).
Ingredients (Still seven ingredients even tho no eggs as long as you count spelt flour and unbleached wheat flour as one ingredient, flour!)
1 lb. spelt flour, WEIGHED
1 lb. unbleached wheat flour, WEIGHED
1 tsp. active dry yeast
1/2 tsp. sugar
1/4 cup + 2 cups warm water
1/4 cup extra virgin olive oil
1 white potato, peeled, cooked, mashed and cooled
1 TB salt
Directions
Peel and cut up the potato and place it in a small pot with water to cover. Bring to a boil, reduce to a simmer and cook until the potatoes are soft.
Drain the potato cooking water into a measuring cup. Add cold water or ice cubes until the water level reaches 2 cups.
Pour the 2 cups of water back into the potatoes and mash thoroughly with 1 TB salt.
Weigh the spelt flour into your mixing bowl until you reach 1 lb. Add unbleached wheat flour until you reach 2 lb.
Stir the flours together and make a well in the center.
Pour 1/4 cup warm water in the well. Add yeast and sugar and stir gently to dissolve. Let sit for 5-10 minutes until bubbling.
Add the mashed potato, salt and water mixture to the flours. Add the extra virgin olive oil to the mix.
Stir all together briefly.
Knead the dough for 10 minutes until it is smooth and elastic. I do this on my Kitchenaid Mixer with the dough hook. The spelt dough works so beautifully that I never have to clean out the bowl before the next step.
Add a little oil to the mixing bowl, and roll the dough in it it until it is completely coated.
Cover the dough in the bowl with a plastic bag (I reserve a garage bag for this purpose). Let rise until doubled in bulk, about two hours.
Punch down, knead slightly and set aside.
Get out your scale and mixing bowl again! Divide the dough into two halves, one for each loaf. Make certain the two halves weigh the same so your loaves will be the same size.
Shape the challot. Divide each half into six approximately equal pieces. Roll into strips as in the picture, with the middle of each strip larger than the ends. Roll in very light flour so strips will remain separate from each other as they rise.
Three strips will make a braid. Place one strip on your work surface, and place two strips over it in an “x” shape. Braid from the middle toward each end and tuck the ends under. Repeat with three more strips. Place one braid on top of the other, and secure the ends.
Repeat this process with the other half of the dough.
Place each loaf on a baking sheet sprinkled with semolina to prevent sticking.
Cover the loaves again with plastic, and allow to rise until doubled, 40 minutes. DO NOT overraise. The top braid will fall to one side, and/or the loaves will flatten.
During this second rise, preheat the oven to 425 degrees.
When the loaves are ready, remove the plastic and put the baking tray with the loaves into the pre-heated oven.
After 10 minutes, reduce the heat to 325 degrees and bake for an additional 30-35 minutes.
Remove from the oven and brush the crust lightly with extra virgin olive oil. Cool.
At this point, I brushed my loaves with a mixture of flaxseed and water, an egg substitute which I hoped would hold seeds in place. It didn’t, and it turned the tops of the loaves white. It did not affect the flavor. I’m going to do a little research for other solutions for a seed-sprinkled shiny vegan challah crust.
Challot rising…
Two double-braid loaves of Water Challah or “Berches,” just in time for Shabbat.
“The breakfast of champions is not cereal, it’s the opposition” …Nick Seitz
Finding a breakfast cereal without sugar can be challenging. Finding one that doesn’t taste like sawdust even more so. I propose a solution to this problem: an Israeli-style breakfast.
I visited Israel for the first time almost 40 years ago. Israel is one of those places that floods one’s mind and senses with thoughts and images. It resonates with the voices of its history and culture, voices which have become part of so many of us through biblical literature although we may have never been to Israel.
Salad For Breakfast … A Delicious Alternative
One of the most memorable experiences I had on that first visit was totally unanticipated: an Israeli breakfast. Originally a very simple meal, Israeli breakfasts have become famous. Many contemporary restaurants specialize in elaborate versions of it.
Israeli breakfasts originated with the halutzim (early pioneers). Quickly prepared from local ingredients, the meal featured a salad of cucumbers, tomatoes, peppers, onion, and perhaps avocado, dressed with olive oil and freshly squeezed lemon juice. Other typical components of the meal were soft cheeses, hard-boiled eggs, pickles, olives, and bread. Beans in the form of hummus (a chickpea “dip”) or ful (fava beans) might also be part of the meal. Ful is the breakfast food of choice in Egypt and is served up with lemon, chopped garlic, onions and olive oil.
When I returned home from that first trip, I began to make a simple version of the Israeli breakfast every morning. Although my knife skills are unfortunate, I became proficient in the small dice typical of an Israeli or Jerusalem salad. We sometimes enjoyed dicing contests to see who could make the salad most quickly and with the most precision.
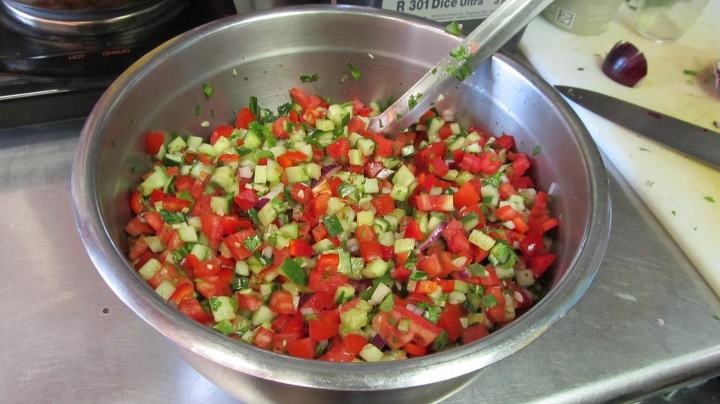
I love to make Israeli Salad. Because of its precision (some would call it tedious), it requires focus, especially if you don’t have great knife skills. For me, it’s “vegetative,” that is, a meditative exercise involving beautiful vegetables:
ISRAELI SALAD
Ingredients
(Serves four along with other breakfast items)
Plum tomatoes, 6 ripe but firm
Pickling cucumbers, 2-3 or Persian cucumbers,* 3-4
Green onions, 2
Red bell peppers, 1-2
Avocado (opt.), 1-2 ripe but firm
Cilantro (opt.)
Extra virgin olive oil
Juice of one lemon
Salt and pepper
*Pickling cucumbers are preferable because of their finer grain and because they require no deseeding. Persian cucumbers are even better where available.
Directions
Although not necessary if the salad is eaten immediately, deseeding the tomatoes extends the time the salad will last without drowning in its own juices. Cut all the veggies into uniform 1/4″ dice. Chop the onions and cilantro. Add extra virgin olive oil, the juice of a lemon, and salt and pepper to taste.
VIDEO #1: For a demo of the dice, see the video my son created of himself preparing Israeli/Jerusalem salad in my cafe (mandolin optional – I do it by hand): http://m.youtube.com/watch?v=bzEcBa9bzu0.
VIDEO #2: Here’s one more video – a session I did at our Woodstock Farmers Market on the Israeli Breakfast. I’m a good deal slower and less expert than my son, but here’s the good news: if I can make this salad, anyone can! – https://m.youtube.com/watch?v=XNAdGkxq5vc
For more, visit my blog, vegetatingwithleslie.org, “Like” me on FaceBook/Vegetating with Leslie or follow me on Twitter, @vegwithleslie.